
November Crafts
Elves of the Forest

This is an easy first whittling project. It can also make a great present idea.
You will need a sharp penknife and some pieces of stick that are around 2 to 3cm in diameter. You will need some scraps of cloth or felt for hats.
When whittling, it is important to cover some safety points first. Our group made the rule that we always sit down when using our knives and we always cut in a direction away from the body.

We found it easiest to start making the neck in the middle of the stick, this way you can turn the stick around and have something to hold onto when whitling in the other direction.
As you can see from the picture, we have whittled in one direction and we are about to turn the stick around to whittle the other way.

When you are ready you can saw through one end of the stick so you are left with the head.

You can continue to whittle more away or use some sanding paper to make the face smooth.

We wrapped a piece of felt around the head and cut it to just the right size to make a cone for a hat.

We sewed up the back of the hat, we fitted them so they can be taken on and off.

When we had finished their hats, we gathered leaves to make capes for them.

These would be a lovely Christmas gift for an older sibling to make for a younger one.


Hand Made Paper Bead and Recycled Button Necklaces
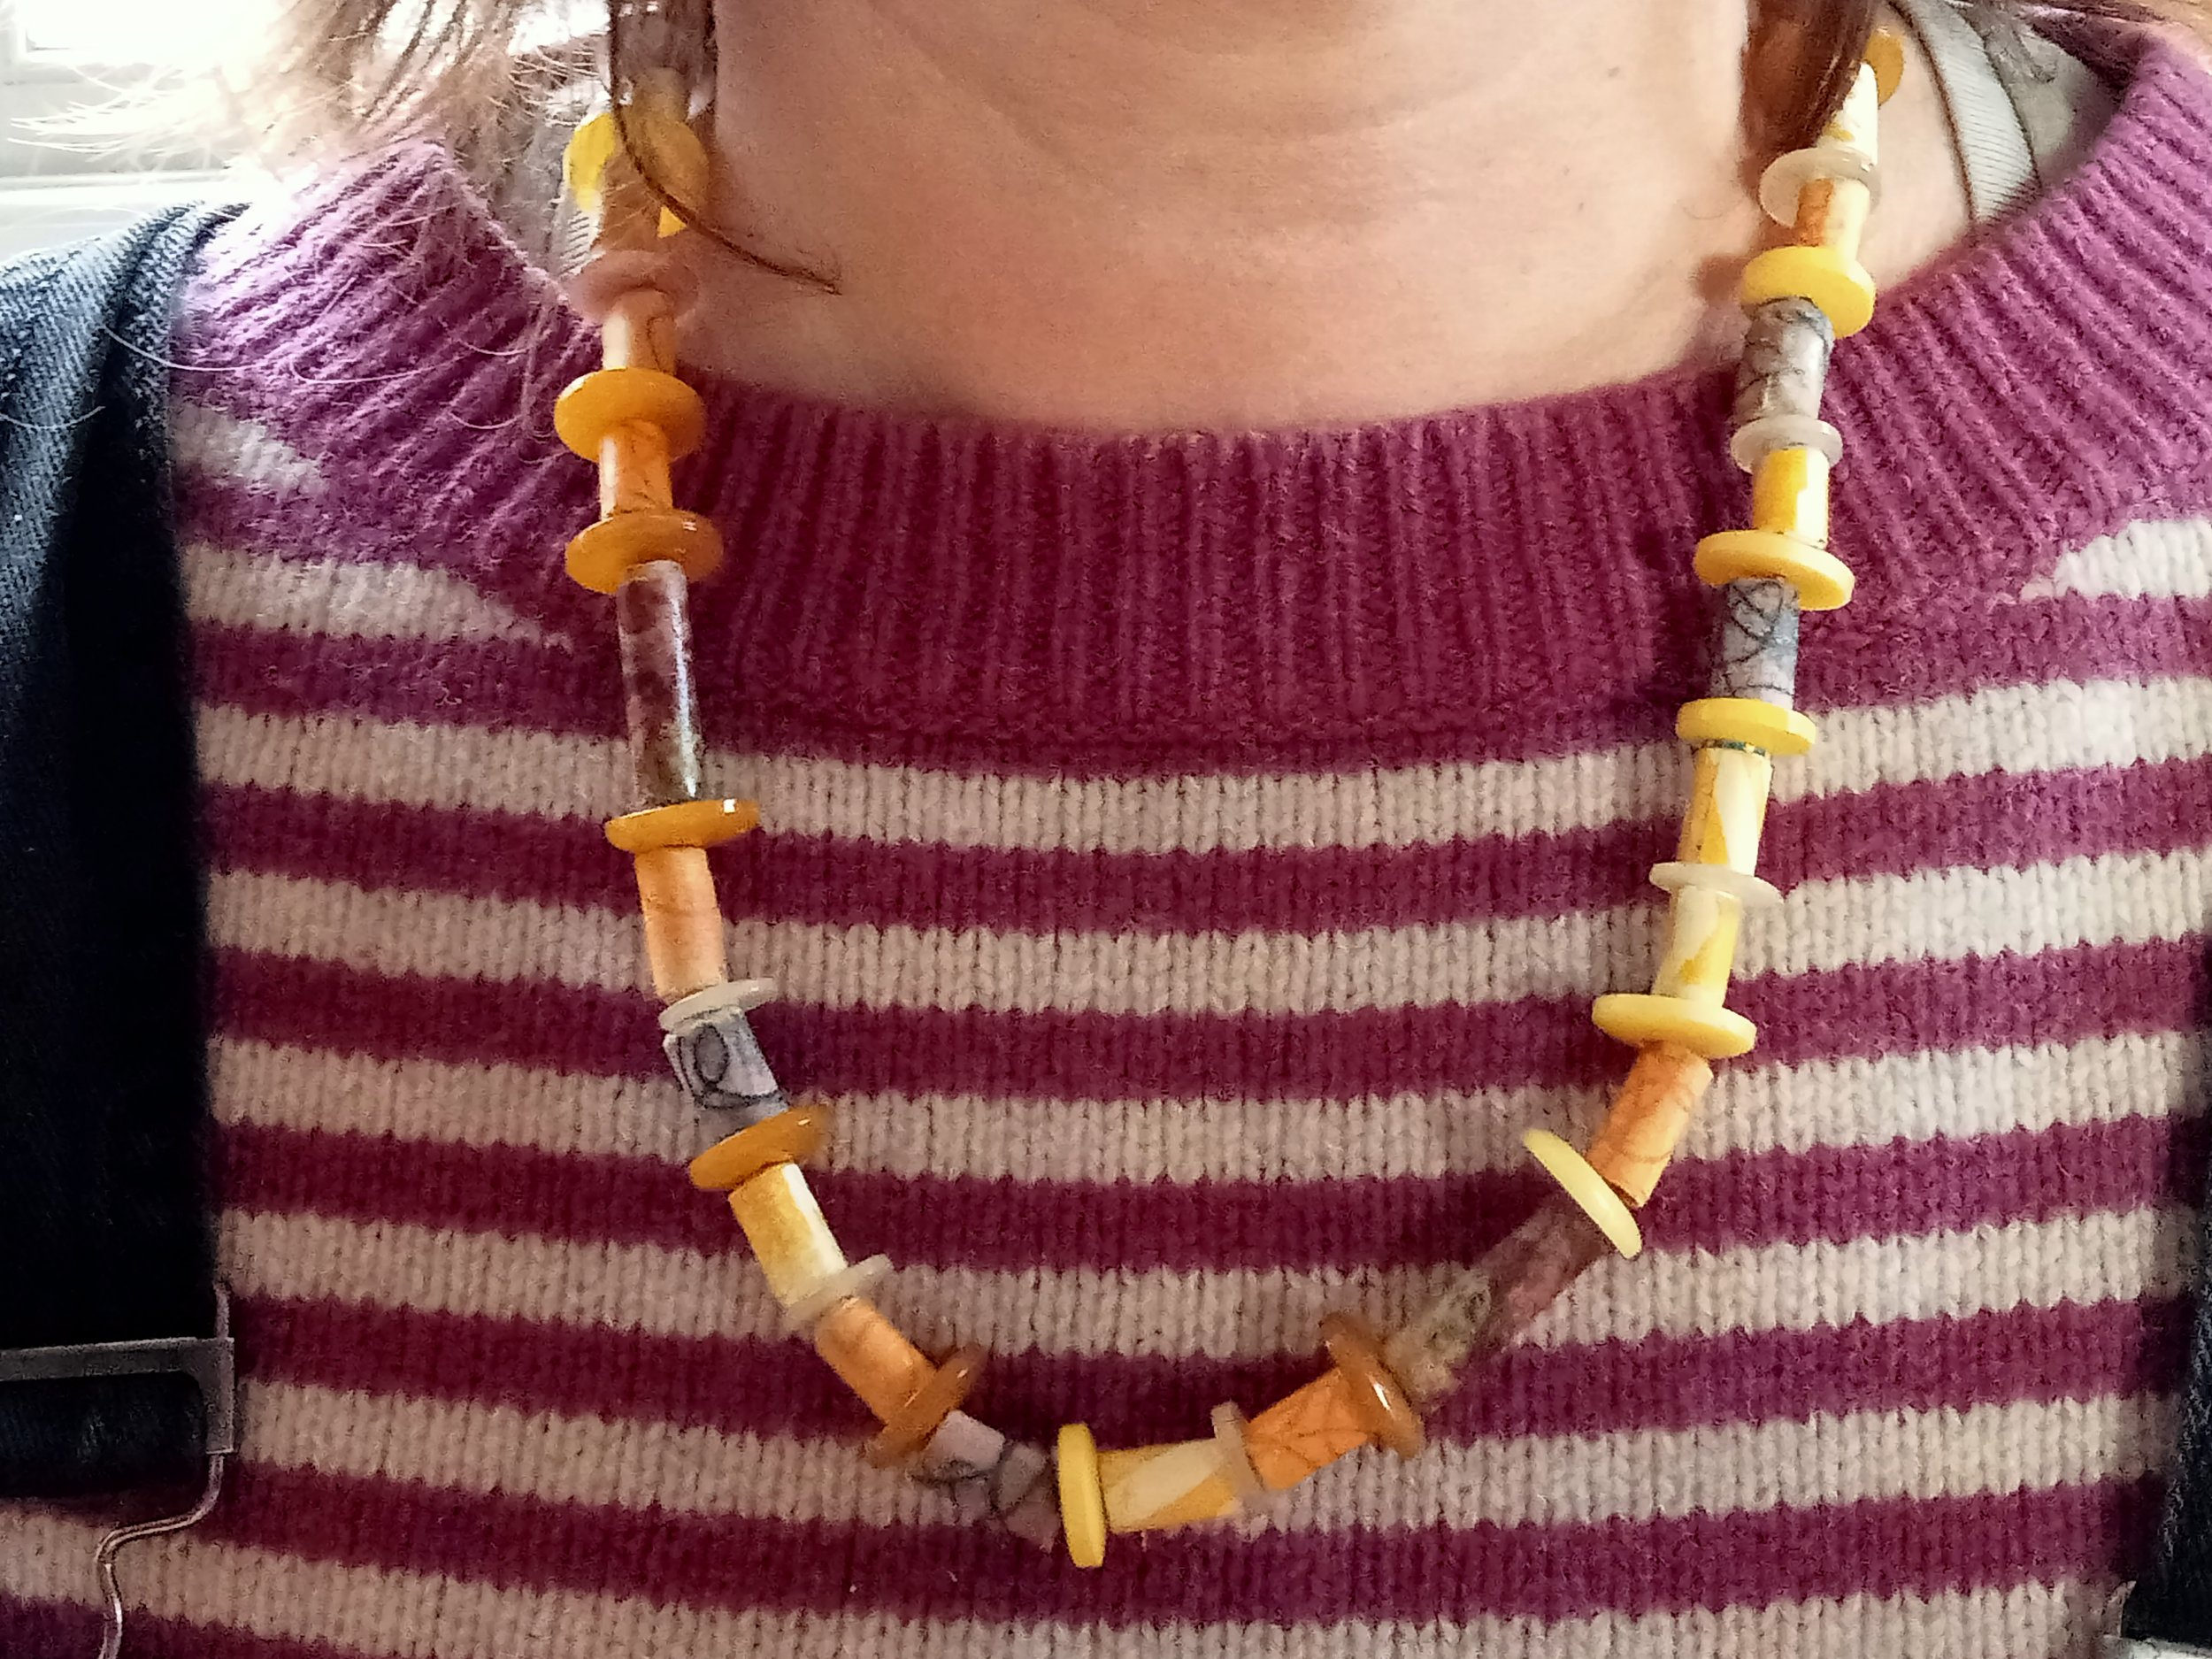
These are very easy to make and are a perfect gift for Christmas.
You will need some offcuts of paper, these could be anything - drawings, patterned paper, wrapping paper, sheet music or printed text. You will also need some PVA glue, some varnish, elastic to thread your necklace on, and some recycled buttons.
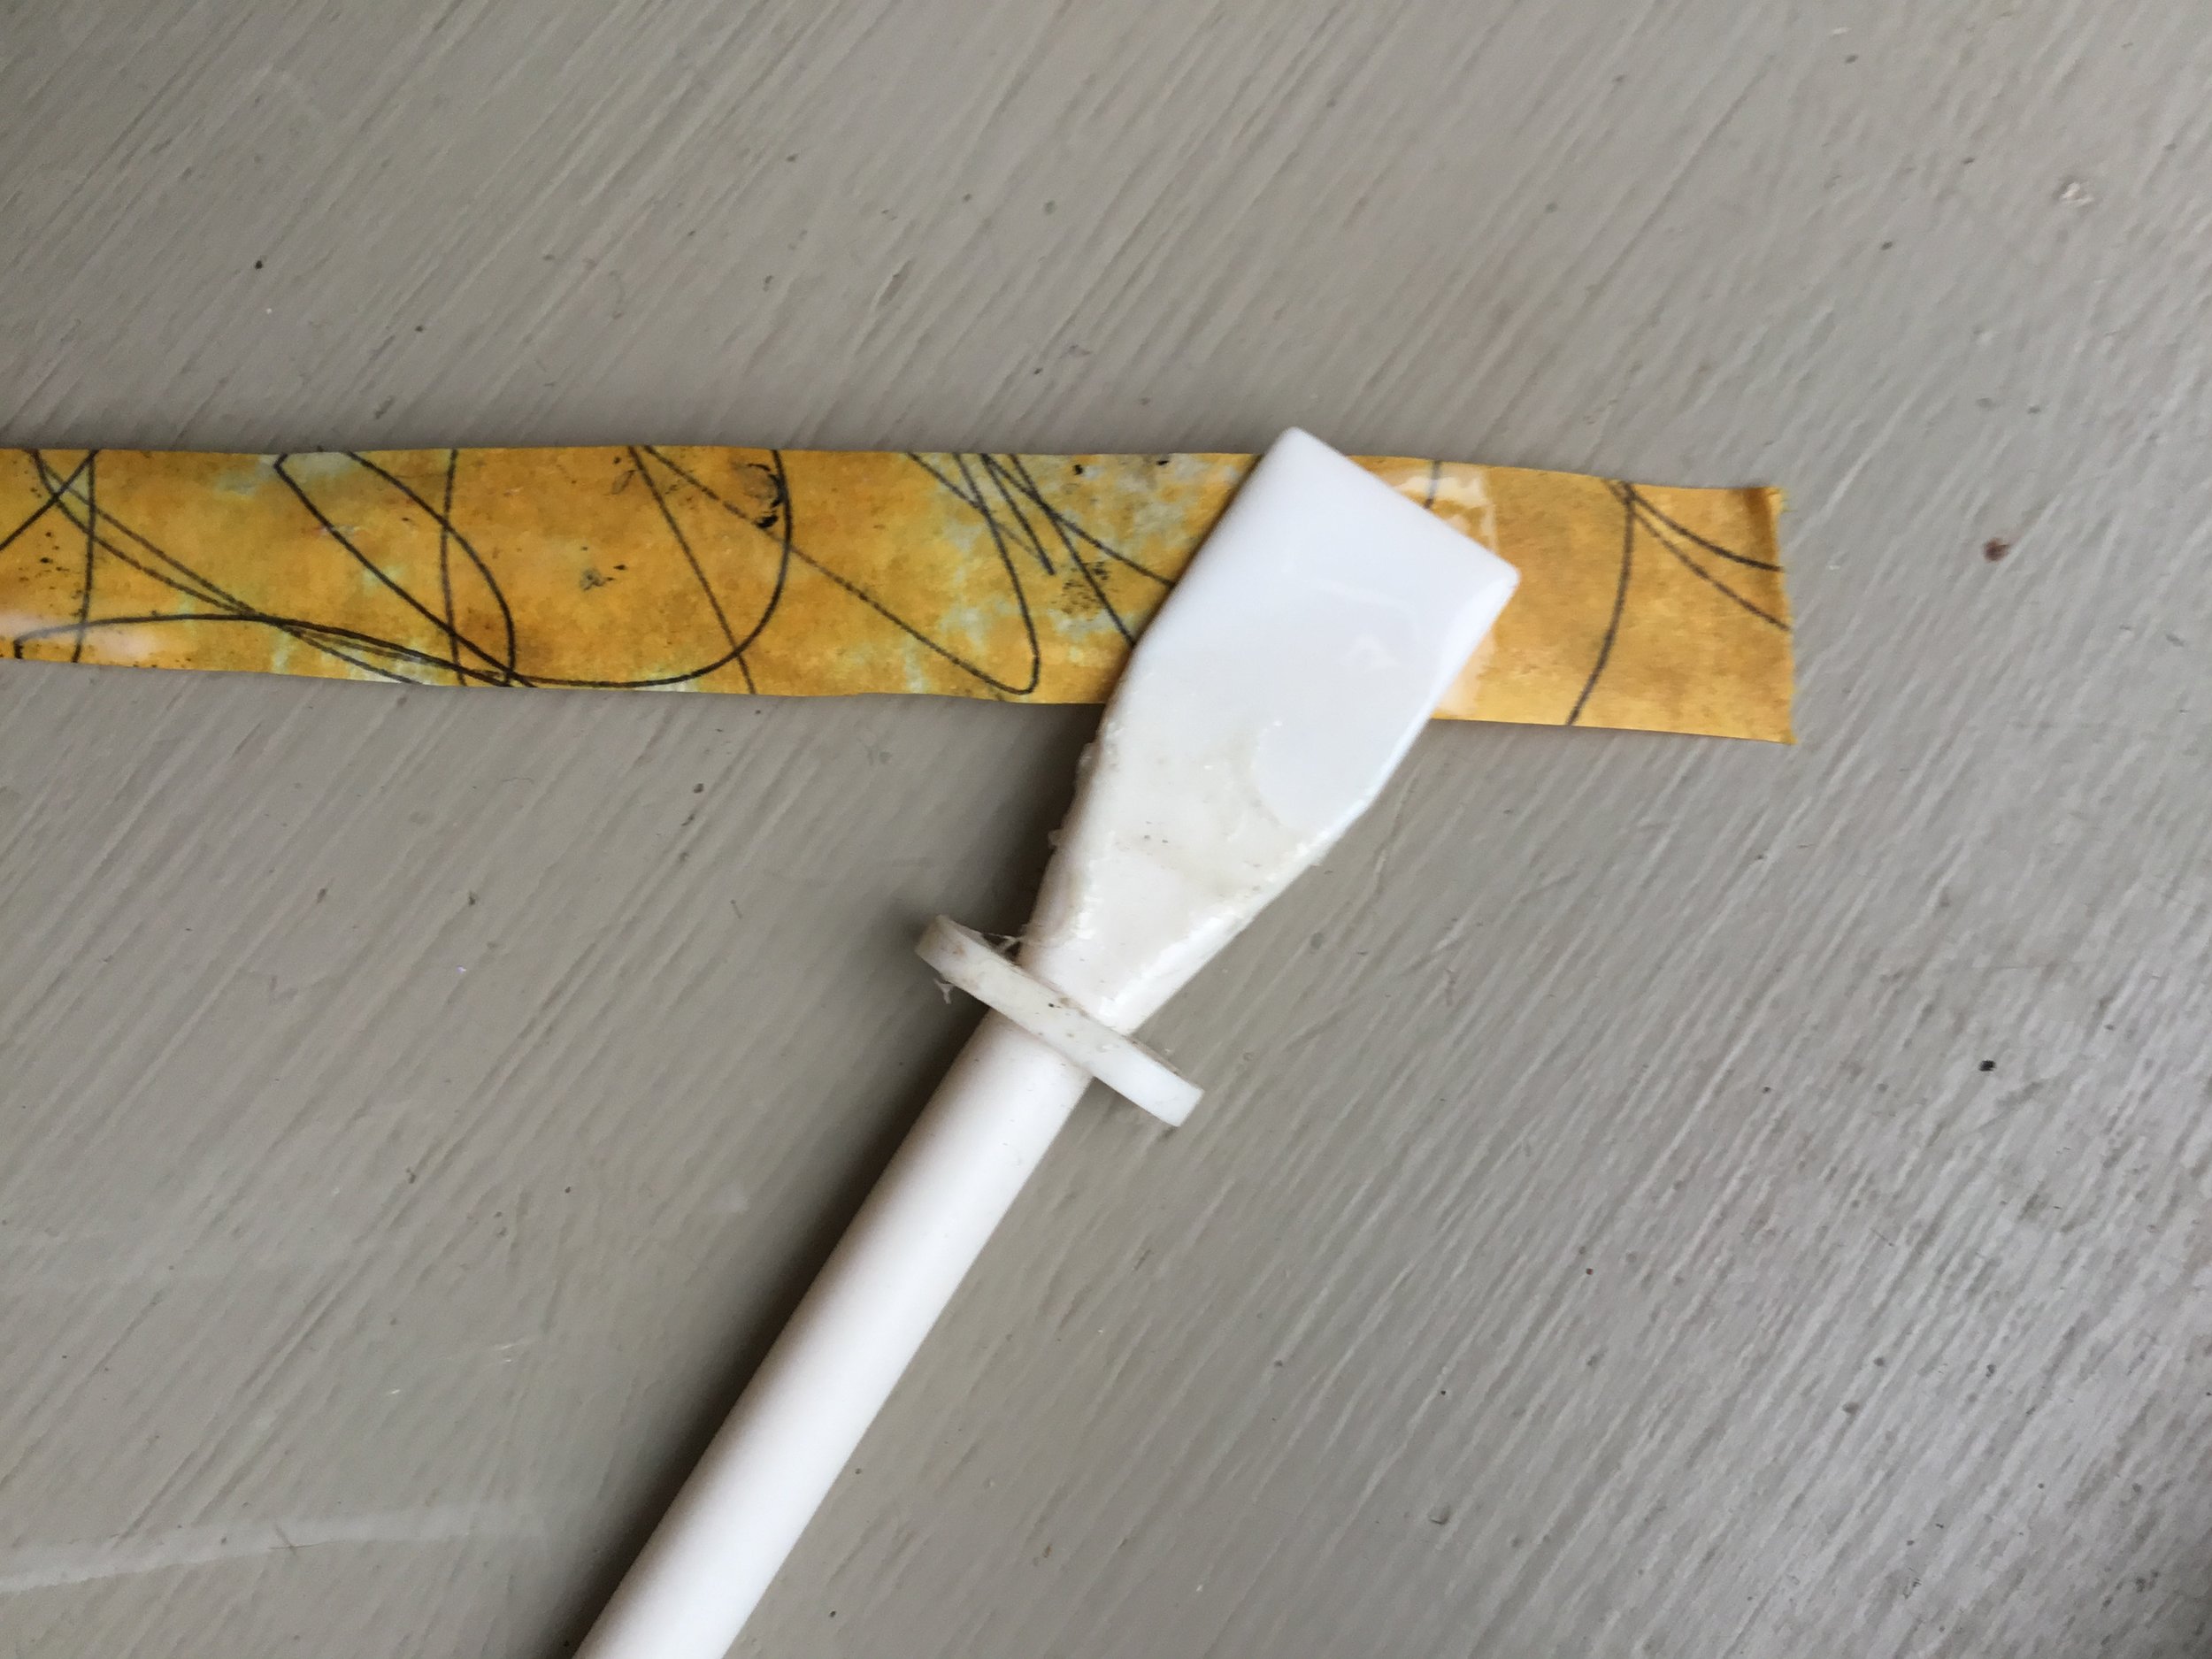
Cut some strips of paper, you can experiment with different widths, but a centimeter wide strip is probably good to start with. The strip wants to be between 10cm and 15cm long, but this will depend on how thick the paper is.

Brush the non patterned side with PVA. Using something like a small paint brush handle, gradually roll up the strip.

Roll the strip up tightly and secure with a hair grip. Leave these to dry, after a few minutes you can take the grips off to use on more beads.

We left ours for 24 hours to dry before brushing them lightly with some varnish, you could brush them with PVA instead. Varnishing helps to preserve them, it stops them from wearing out too quickly and helps make them slightly water resistant.
To make varnishing easier, we pushed some cocktail sticks into matchboxes. This way you can varnish quite a few and then leave them on it to dry.

The last part is threading the beads, we chose colour themes and found similar buttons to thread in between.

When you have reached the length you want, knot the thread or elastic and push the knotted area inside a bead with a little glue to hide the knot.

You can make these personal for the person you are giving it to, by choosing their favourite colour, using sheet music if they are a musician, printed numbers for a mathematician, flower prints for a gardener, paw prints for a dog lover….


